Proper tire maintenance and knowing when to replace your vehicle’s tires are important aspects of automotive care that directly impact your safety on the road. Whether you’re a seasoned driver or new to car ownership, understanding the ins and outs of tire changing and recognizing the signs of wear can save you time, money, and potentially prevent accidents. This comprehensive guide will equip you with the knowledge and skills to handle tire-related tasks with confidence, ensuring your vehicle performs optimally and safely in various driving conditions.
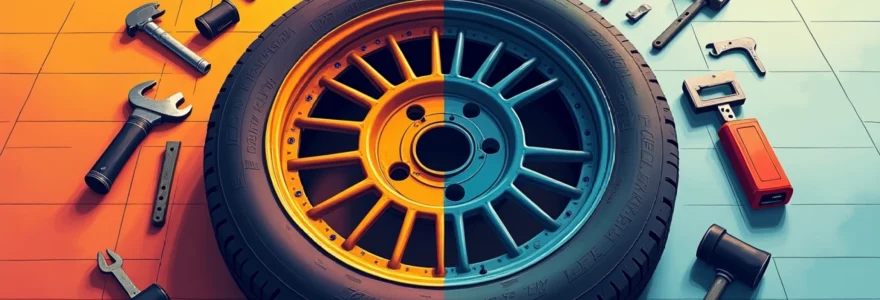
Essential tools and equipment for tire changing
Before diving into the tire changing process, it’s important to gather all the necessary tools and equipment. Having the right gear on hand will make the job smoother and more efficient. Here’s a list of essential items you should have in your vehicle or garage:
- Jack and jack stands
- Lug wrench
- Spare tire (properly inflated)
- Wheel chocks
- Flashlight
Additionally, it’s wise to keep a pair of work gloves and a small piece of plywood in your emergency kit. The gloves will protect your hands, while the plywood can provide a stable base for the jack on softer surfaces. Remember, being prepared with the right tools can make a significant difference when you’re faced with a flat tire situation.
Step-by-step tire changing process
Changing a tire might seem daunting at first, but with practice and the right technique, you can master this essential skill. Let’s break down the process into manageable steps, ensuring you can handle a tire change safely and efficiently.
Safely jacking up the vehicle
Before you begin, ensure your vehicle is parked on a flat, stable surface. Engage the parking brake and place wheel chocks behind the wheels that will remain on the ground. Locate the proper jacking points on your vehicle’s frame – consult your owner’s manual if you’re unsure. Position the jack securely under the jacking point and begin to raise the vehicle slowly. Never place any part of your body under the car while it’s supported only by the jack .
Removing lug nuts with proper torque sequence
Once the tire is off the ground, it’s time to remove the lug nuts. Use your lug wrench to loosen them in a star pattern, but don’t remove them completely yet. This sequence helps maintain even pressure and prevents warping of the brake rotor. Remember, some vehicles have lug nuts with unique designs or locking mechanisms, so familiarize yourself with your specific model’s requirements.
Dismounting the old tire
After loosening the lug nuts, remove them completely and set them aside in a safe place. Carefully pull the tire straight off the wheel hub. If it’s stuck, you may need to give it a gentle kick or use a rubber mallet to free it. Be cautious not to damage the wheel or hub in the process.
Mounting and aligning the new tire
Take your spare tire and line it up with the wheel hub. Lift it into place, ensuring it’s seated properly on the hub. This step can be physically demanding, so use proper lifting techniques to avoid injury. Once the tire is in position, replace the lug nuts by hand, tightening them just enough to hold the wheel in place.
Proper lug nut tightening techniques
Lower the vehicle until the tire is touching the ground but not bearing the full weight of the car. Using your lug wrench, tighten the lug nuts in a star pattern, applying even pressure. Once you’ve gone around once, repeat the process to ensure they’re securely fastened. Avoid over-tightening, as this can lead to stripped threads or damaged wheels . After lowering the vehicle completely, give each lug nut a final check for tightness.
Identifying tire wear patterns and their causes
Understanding tire wear patterns is important for maintaining your vehicle’s performance and safety. Different wear patterns can indicate various issues with your car’s alignment, suspension, or tire pressure. By recognizing these patterns early, you can address problems before they lead to premature tire replacement or affect your vehicle’s handling.
Center wear : over-inflation indicators
When the center of your tire’s tread is more worn than the edges, it’s often a sign of over-inflation. This causes the middle section of the tire to bear more weight, leading to faster wear in this area. Regularly check your tire pressure and adjust it to the manufacturer’s recommended levels to prevent this issue.
Edge wear : under-inflation signs
Conversely, if the edges of your tires are wearing faster than the center, under-inflation is likely the culprit. Under-inflated tires flex more on the sides, causing increased friction and wear. This not only reduces tire life but also decreases fuel efficiency and can lead to overheating and potential blowouts.
Uneven wear : alignment and suspension issues
If you notice uneven wear across the tire’s tread, particularly if one side is wearing faster than the other, it could indicate problems with your vehicle’s alignment or suspension. This type of wear can also be caused by worn ball joints, wheel bearings, or other suspension components. Regular alignment checks and addressing any suspension issues promptly can help prevent this type of wear.
Cupping : shock absorber problems
Cupping or scalloped dips around the tire’s circumference often point to worn shock absorbers or struts. This uneven wear pattern occurs when the tire bounces as you drive, creating a series of high and low spots on the tread. If you notice this pattern, have your suspension system checked by a professional as soon as possible.
Tire pressure monitoring systems (TPMS) explained
Modern vehicles are equipped with Tire Pressure Monitoring Systems (TPMS) that alert drivers when tire pressure falls below recommended levels. These systems use sensors to monitor tire pressure and can greatly enhance safety by preventing under-inflation. However, it’s important to understand that TPMS is not a substitute for regular manual checks.
There are two types of TPMS: direct and indirect. Direct TPMS uses pressure sensors in each tire to provide real-time pressure readings. Indirect TPMS, on the other hand, uses wheel speed sensors to detect changes in rotational speed, which can indicate low tire pressure. While TPMS is a valuable safety feature, it’s important to perform visual inspections and manual pressure checks regularly to catch any issues the system might miss.
Tire rotation patterns for optimal longevity
Regular tire rotation is essential for even wear and maximum tire life. The rotation pattern you should use depends on your vehicle’s drivetrain configuration. Let’s explore the recommended patterns for different drive systems.
Front-wheel drive rotation methods
For front-wheel drive vehicles, the most common rotation pattern is the “forward cross.” In this method, the front tires move straight back to the rear axle, while the rear tires move diagonally to the front. This pattern helps distribute wear more evenly, as front tires typically wear faster on front-wheel drive cars.
Rear-wheel drive rotation techniques
Rear-wheel drive vehicles often benefit from the “rearward cross” rotation pattern. Here, the rear tires move straight forward to the front axle, while the front tires move diagonally to the rear. This method helps balance the wear between the drive and non-drive wheels.
All-wheel drive rotation strategies
For all-wheel drive vehicles, the rotation pattern can vary depending on the specific vehicle design. Some manufacturers recommend a simple side-to-side rotation, while others suggest more complex patterns. Always consult your vehicle’s manual for the recommended rotation pattern, as using the wrong method could affect your car’s performance and handling.
When to replace tires : key indicators and measurements
Knowing when to replace your tires is important for maintaining your vehicle’s safety and performance. There are several key indicators you should regularly check to determine if it’s time for new tires.
Tread depth assessment using penny test
One of the simplest ways to check your tire’s tread depth is the penny test. Insert a penny into the tire’s tread groove with Lincoln’s head upside down and facing you. If you can see all of Lincoln’s head, your tread depth is less than 2/32 inch, and it’s time to replace your tires. While this method is convenient, using a proper tread depth gauge provides more accurate measurements.
Age-related degradation and rubber compound breakdown
Even if your tires have sufficient tread depth, age can be a factor in tire replacement. Over time, the rubber compounds in tires break down, leading to reduced performance and increased risk of failure. As a general rule, consider replacing tires that are more than 6-10 years old, even if they appear to have adequate tread. Check the tire’s sidewall for a code that indicates its manufacturing date.
Visible damage : bulges, cracks, and punctures
Regularly inspect your tires for visible signs of damage. Bulges or blisters on the sidewall indicate a weakened internal structure and require immediate replacement. Similarly, cracks in the sidewall or tread area can lead to air leaks and potential blowouts. While small punctures can often be repaired, larger punctures or damage near the sidewall typically necessitate tire replacement.
Performance changes : handling and noise considerations
Pay attention to changes in your vehicle’s handling and noise levels. If you notice increased vibration, reduced traction in wet conditions, or unusual noise while driving, it could be a sign that your tires need replacement. These symptoms can indicate uneven wear, internal tire damage, or simply tires that have reached the end of their useful life.